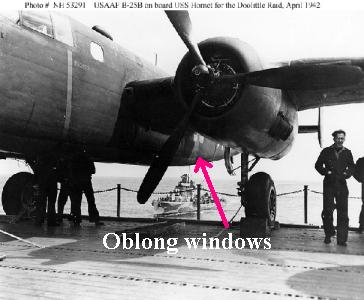
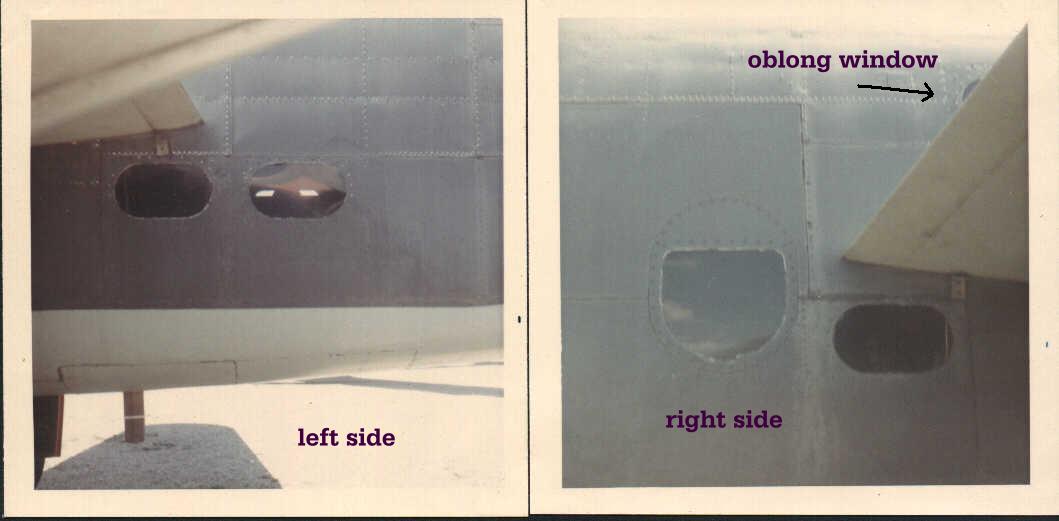
Photos taken, in the early 60's, of the Air Force Museum's B-25C that was converted into a Doolittle Raider. This was the arrangement of the fuselage windows on all B models and carried over into the early C model production. On pg. 59, in the book WWII War Eagles, Global Air War in ORIGINAL COLOR by Jeff Ethell & Warren Bodie, there is an excellent color shot of Raider a/c #02297, that clearly shows the right side as depicted above. This can also be seen in a deck shot of a/c #02298 on pg. 34 of Destination: Tokyo by Stan Cohen. The left side window arrangement can be seen in the deck shot of a/c #02268 shown below.
Step One: Fill in the existing hole on the left side and sand it smooth
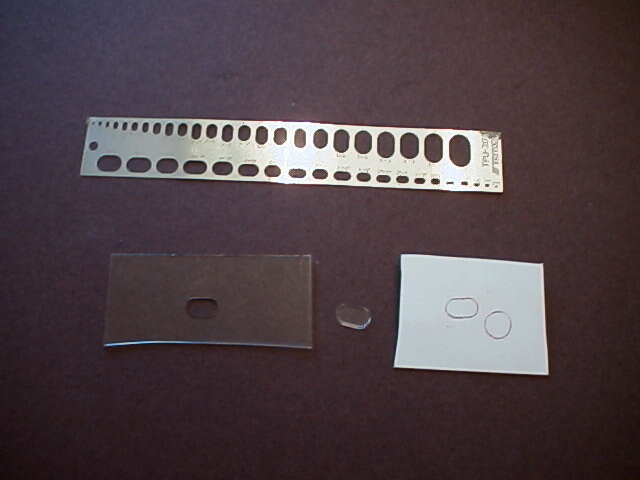
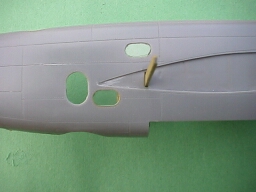
Step Two: Use the oval window as a template, or use an oval hole guide, and on a piece of clear plastic etch an oval. Cut the oval hole out. To illustrate, since the clear template is difficult to see, the white plastic on the right is to show that the kit holes can be used as a template for cutting windows..
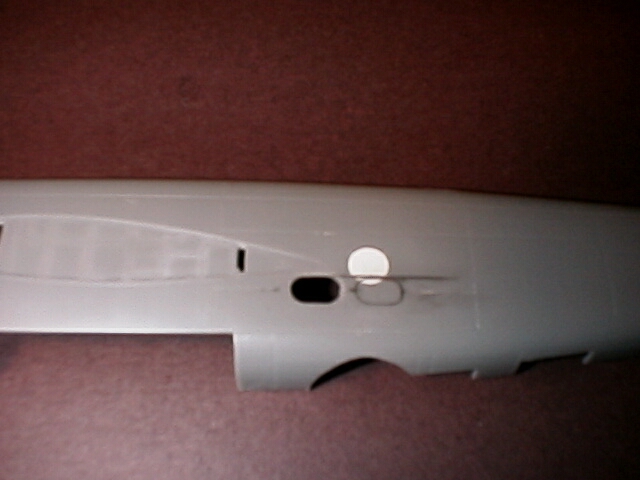
Step three: Use the template to draw an outline of the oval window onto the fuselage. I suggest using a pencil so if you don't like the location the first time you can erase it and do it again. Once satisfied, drill and cut the new .window out. The template that you use for the oval window can be used to etch a piece of clear plastic to make the new val windows and used on the right side to locate the oval window above the wing that Accurate Miniatures didn't include. Use the same process.
Finished left side windows.
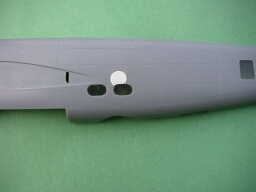
Step four: To correct the right side, after completing the oval window, cut out.the escape hatch using the etched line as a guide. Using the hole as a template, cut a piece of clear stock to fit the large oval hole and glue it in place. Using the photo above as a guide, you can cut a mask the correct shape to place on the clear part and then when the fuselage is painted, pull your mask off and the window in the hatch will be clear. A technique I use, is to paint the interior color first on the outside of the hatch and then paint the exterior OD. That way the hatch, if viewed from the other side, will appear to be painted the interior color (you probably won't be able to see inside anyway).
Here is how to correct the Accurate Miniatures B-25B window arrangement:.
Any questions or comments I can be reached at this email linK:.